Okay let’s face it. The Windows 365 app is just ONE more app to consume our Windows 365 or Cloud PC. But it brings something to the table.
With the Remote Desktop app that we have all learned to connect to our Cloud PCs, AVDs or published apps. And it’s a great app, especially if you work as a consultant like I do and have multiple environments that you connect to, I connect to 2-3 different tenants on a weekly basis. But the Remote Desktop lacks key features when it comes to Windows 365.
If you have ever used Windows 365 through the browser, you know what I’m talking about. There is NO WAY to reboot, restore or troubleshoot a Cloud PC from within the Remote Desktop app, you can simply just connect to your session, and for anymore “advanced” user action you have had to rely on the browser.
Enter the Windows 365 application.
In the Windows 365 app you are able, as in the Remote Desktop app, to connect to your Cloud PCs which are connected to your signed in account. This is the caveat though. Only machines available for the signed in account are displayed, if you are running multiple accounts (like I do) you will have to switch accounts.
However, the features in the Windows 365 app make it worth it, since I can fully control my Cloud PC from within the app, and I don’t have to rely on the website to perform addition actions like I needed previously.
If you have ever used the Windows 365 website to connect to your Cloud PC, you will recognize this experience. The layout is familiar to the web, but you get all the benefits of using the app (like multiple monitors, smart sizing, and Teams optimizations), but you also get the user actions previously exclusive to the web portal.
Working with the Windows 365 app compared to the Remote Desktop app is for me as an end-user not really any different, other the account part mentioned earlier. But if you only use one account, like most are, you will never notice this difference.
You should really check out the new Windows 365 app which is in preview. You can find it on this link or if you search the Microsoft Store for Windows 365. But like always with preview things, be aware that it’s in preview!
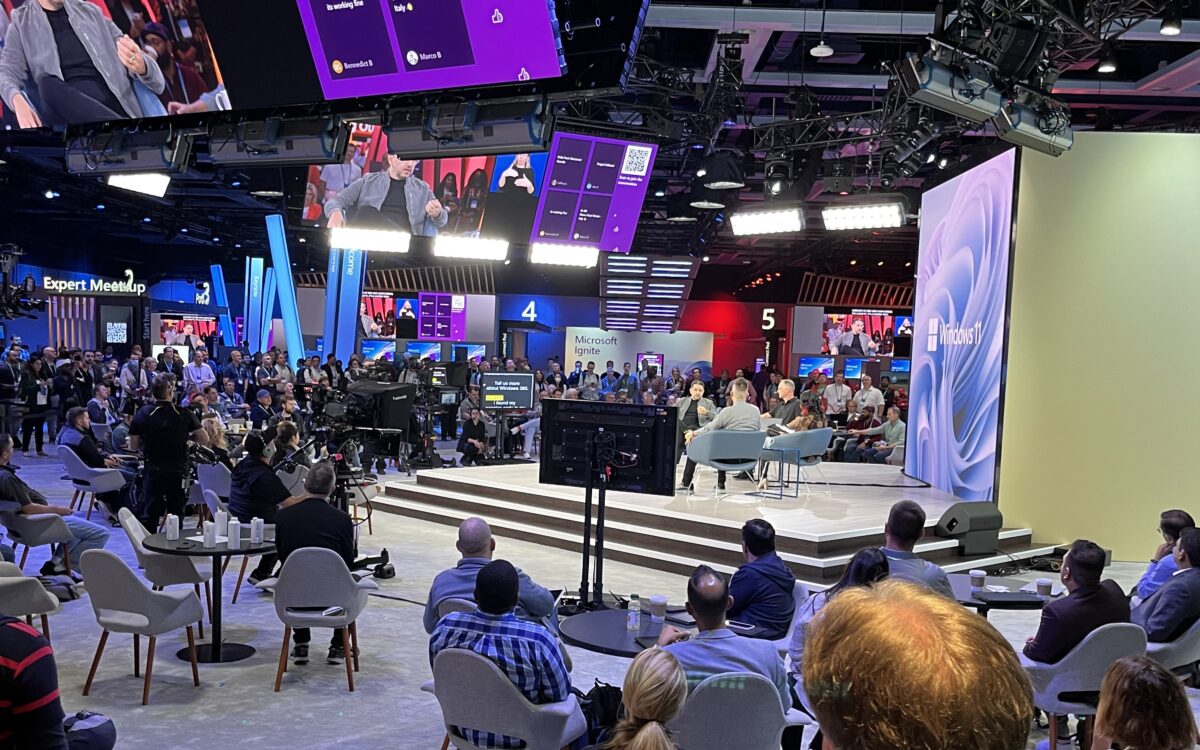
So, 2022 was the year Microsoft Ignite was FINALLY a physical event again, and for the first time on Microsoft home turf in Seattle.
Being an ex-Microsoft FTE, this gave me major flashbacks to TechReady, which was an internal training event Microsoft used to host in Seattle. Same location as Ignite, just no hilarious videos with Norm Judah encouraging everyone to fill out the evaluations.
Ignite was different this year since it’s a hybrid event, and the first big such for Microsoft which means that they are still trying out the concept.
Overall, I had a lot of fun. For me, meeting up with peers and having the time to focus on the content is important, if sessions are digital or physical doesn’t really matter. Some sessions made more sense virtually. But in-person sessions are usually the best, and you could really tell that people wanted this. Especially the big keynotes are always more fun in-person.
But I was missing the expo where you can meet vendors or just mingle with Microsoft people, there wasn’t really any space for this, except for an awesome Surface expo.
However, the width that the “old” Ignite had was missing and the break-down sessions were missing. The feeling was that this hybrid thing was more focused on people attending remote, and people on site were more the live audience.
There was a lot of news and I’ve picked out the ones I found most interesting.
Windows
Just before Ignite kicked off, there was a Surface event where some news around Windows 11 was released. Check it out here:
This was released a few days prior to Microsoft Ignite, but Microsoft 365 and Windows 365 will be supported on Meta Quest devices, providing a new kind of experience for productivity in the Metaverse.
This means that you will be able to run a fully supported productivity setup in the Metaverse with e.g., Microsoft Teams and Windows 365. Windows 365 is not yet released for Metaverse, but this indicates strongly which direction VR is heading now.
The Remote Desktop app has for long been the go-to application for your VDIs, but now for Windows 365 you can use the brand-new Windows 365 app which is now in public preview. This app aligns more with the Windows 365 features found on the web portal but with the advantages of the desktop app! Read more here:
Getting messages out to end-users is always a struggle within IT. There is a new feature for Windows 11 where you can send organizational messages, natively in Windows, to your users instead of sending them email using Microsoft Intune coming in November to Windows 11 22h2. Read more here:
The brand Microsoft Endpoint Manager or MEM is going away. The new product-family name will be Microsoft Intune where a bunch of things will be included, Configuration Manager amongst others. You can read more about the anoncment here:
Enabling local admin for users on a temporary basis has been a struggle with Intune managed devices. Old solutions relying on attributes in the on-premises AD do not work and there aren’t really any “best practices” established around this yet.
However, Microsoft is looking to solve this with the Endpoint Privilege Management which is in public preview. Read more in the link above.
Automated app patching as add-on
Keeping applications up to date is something that many stuggles with, and there are products around to solve that. Now Microsoft are throwing themselves into this game as well, which makes a lot of sense. This is just briefly mentioned in the “Further value and looking forward” part of the article, but if they are able to deliver on a native Microsoft Intune feature for this, that would simplify things a lot!
This is a topic that keeps on coming back when you start to talk about Windows 365 and Cloud PCs.
“This sounds really cool, but there are sooooo many licenses to choose from. Which one should I get?”
The answer is just as hard as the question. It depends.
It depends mostly on what your users will use their Cloud PCs for, and what you consider to be a fair machine to provide your users with.
Licenses are rarely someone’s favorite subject (I know there are some people who do favorite it thought), but for Windows 365 it’s really simple and straight forward and this is something you as an admin should care about.
Different sizes
Licenses is what defines how powerful your Cloud PC will be, meaning how many vCPUs, how much RAM and how many Gb of storage you will get. Licenses for Cloud PCs are also subscription based, billed on a monthly basis (this could vary depending on your agreements), meaning that you can easily adjust your volumes.
There are a few different ways to look at this, but the image below is a pretty good pointer in when to use what. Like the example below states, you could classify this into three categories:
Basic
Standard
Premium
Depending on what your users workloads are, you can quite easily find a good place to start using this simple matrix.
If you want to expand even further, there are a lot more variations available than just those three. There are today 11 different licenses available for Cloud PCs today, divided into 4 different vCPU and RAM categories, where storage adds the variation. Depending on your vCPU and RAM configuration you can select between 64 Gb up to 512 Gb storage.
Going back to the initial question, what licenses should you get?
I kind of have to stick to my initial statement, “it depends“, because this really comes down to what these machines will be used for. If you are looking at users running mostly productivity and Line of Business (LOB) applications, the 4vCPU/8Gb RAM/128 Gb storage is a pretty sweet deal. Since most of us today are using OneDrive, local storage isn’t that important anymore for many users on a Cloud PC and this license is usually where I recommend many to start since it would fill the basic needs of their user base.
The 4 vCPUs and 8 Gb of RAM will provide you with a great user experience and wont at the same time cost you are fortune. The step-up from this license is the 8 vCPU with 16 Gb RAM if you need a more powerful machine running heavier workloads.
If this size is to small or big, you can always scale up or down using the resize feature (which I’ve written about in this post).
But what about diskspace? To be honest, this is probably the least of your concerns, the performance with RAM and CPUs are more important. Local storage is not to important in a world where most documents are stored in OneDrive or SharePoint, that leaves diskspace to be used by applications. For most scenarios you wont need more than 128 Gb disk, bit of course there are always use cases where local storage is key. But diskspace is like all the other parts, it can be expanded. HOWEVER, you cannot decrease diskspace. This means that you can move from 128 Gb disk to 512 Gb, but not the other way around. This is an important thing to keep in mind!
Final thoughts
The most important part is to get started somewhere if you want to utilize the awesome benefits that Cloud PC brings, and you can always adjust along the way!
I hope this gave some kind of pointers in where to start!
Monitoring is an important part of all IT operations, and knowing when something fails is crucial. Also knowing before end-users starts calling is even better!
Microsoft has released a new feature in Microsoft Endpoint Manager admin center (MEM) which could help with this called Alerts, which is currently in public preview for Windows 365 features.
With Alerts you can setup notifications, both in the MEM admin center but also through email. This would allow you to get the information and take action as soon as something happens.
There are today three types of alerts you can configure:
Azure network connection failure
Upload failure for custom images
Provisioning failure impacting Cloud PCs
Set up your alerts
Setting up your alerts are really simple. Start by browsing to the Microsoft Endpoint Manager admin center (https://endpoint.microsoft.com).
Then navigate to Tenant Administration > Alerts (Preview) > Alert rules. This is where you will see available alerts, configure and enable them.
Click the alert rule you want to configure, in this case we will configure the “Provisioning failure impacting Cloud PCs” alert.
You have three sections to configure: Conditions, Settings and, Notifications.
Under Conditions you can specify how many events need to happen before an alert is triggered. For this alert we can either choose a number of Cloud PCs or a percentage of Cloud PC needs to fail before we get an alert. I would consider the suggested setting in this case to be good, since I want to know if one or more Cloud PCs fail.
Next part is Settings where we need to select the severity of the alert and the status of the alert. Microsofts recomendation is to clasify this as critical, which sounds like a good setting and we will set the status to On since we want to enable this alert.
Last and final part is the notifications, if you want to get a notification in the portal and by email. By enabling “Portal pop-up” a notification will show up in the portal if a provisioning fails.
The email part is for where an email notification should be sent. You can add multiple recipients, and I’ve added my Service Desk email adress in this instance, since I want them to get the information. This could also be set to an administrator or the operations team for Cloud PCs, that totally up to you!
After doing all our settings, click “Apply” at the bottom of the screen and your rule will be enabled.
You can at any time easily turn on or off an alert rule by checking the check-box next to it and use the “On” and “Off” buttons.
And now you just need to sit and wait for the alerts to hopefully never show up!
Since making the Cloud PC provisioning isn’t something I’ve figured out how to do on command, I’m not able to do on command I don’t have any screenshots of the alerts.
If you want to see some screen shots of this, I suggest you head over to my fellow MVP Morten Pedholts blog, who actually got a machine to fail in provisioning.
Final thoughts
Alerts in MEM has great potential, and I can really see this expanding going forward to other things than just Windows 365 and the three alerts we are limited to today. Really looking forward to see how this feature will evolve!
Here is something I learned the hard way in my own tenant. Windows 365 kind of messes with your account security if you are consuming Microsoft 365 services from another device than your cloud PC. Especially if you live in a country like Sweden where the Windows 365 service is yet not available in Sweden Central. Further more, it seams to only affect you the first few times you sign in, before the algorithms learn your behavior.
What happened to me was that Identity Protection and user risk blocked me out from my Cloud PC, since I had defined it to block if user risk was too high and not password change.
It took me a while to just realize what had happened, and how to get around it (since Identity Protection is not an area I’m to familiar with).
Why is that?
Well, there is something called “Impossible travel” or atypical travel which is used to assess the risk of your account being compromised, which means that it’s very unlikely that you would travel from let’s say Stockholm to Amsterdam within a few seconds. This is a very good thing to have in place since it will increase the security of your accounts a lot!
This feature is a part of the Identity Protection part of the Azure AD (which requires a Azure AD P2 license), and can help you identify and take action on risky sign-ins performed by users, or detect if their credentials has been stolen.
There are two key parts of this, Sign-in risk and User risk, and you can control what happens if a user does not live up to the expected level. And of course, Multifactor Authentication (MFA), plays a key role.
Conclusion
I’m not going to dig deep into this at all, just sharing an observation basically. If you want to read more about Identity Protection, I really recommend you having a look at the Microsoft Learn documentation, it provides a good overview.
Like I stated in the beginning of my post, this was something I noticed in my lab, but I’ve not seen it in the wild so far in any production environment. For my environment, I solved it by dismissing the risk for my user which eventually allowed me to sign in.
I’ve spent a good amount of time trying to reproduce this sign-in block, but I haven’t been able to yet.
Some of you might have seen something called Microsoft Dev Box flash by in your feeds. Something called Dev Box doesn’t really sound like something device-related, it sounds more like something your developers would care about. They probably will, but there is a big reason you should care too.
Microsoft Dev Box is a new tool in the toolbox for you, this time to provide Cloud PCs to your developers or such. There are many similarities between Dev Box and Windows 365, but also Azure Virtual Desktop (AVD). However, your developers can themself deploy computers to your tenant based on a template that you create, which means that a developer could create a new test PC when they need one without really involving you as an admin.
Microsoft Dev Box is not licensed-based like your Windows 365 Cloud PC, instead, it’s consumption-based like an AVD. But you have the simplicity of setting up new computers from Windows 365, so it’s almost like a mix of the two. However, the user target group is different since you can get more powerful machines that are deployed by the user themself.
You can read more about the Microsoft Dev Box here, and what Microsoft calls a “Dev Workstation in the cloud”.
Getting started with Microsoft Dev Box
To get started with Microsoft Dev Box you need the following:
An Azure subscription
Azure AD
Intune tenant
Windows licenses (typically as part of your EMS or M365 license)
Setting up the Microsoft Dev box is completely taken care of in the Azure portal, not the Microsoft Endpoint Manager admin center.
To start off, you need to head over to portal.azure.com and make sure you have an active Azure subscription to provision this. Then, search for Microsoft Dev Box.
This is where your different environments will be hosted. You can have multiple Dev Boxes set up for different parts of the organization. In each Dev Box, you can also create different projects. In the real world, you would probably configure this in a landing zone specifically set up for your dev-users who will work on certain projects.
The first step is to create a new Dev-center by pressing “+ Create” in the Microsoft Dev Box pane. Select what subscription and resource group you want to deploy this too and give your Dev-center a name. You will also need to select an Azure region where your machines will be hosted. Since this is a preview, the selection of what Azure data center regions are available is limited. Once you have selected this, press “Review + Create” and create your Dev-center.
Once the Dev-center has successfully deployed, you need to create a Network Connection where you define if your Dev Box PCs should be hybrid-joined or Azure AD joined. Head back to the Microsoft Dev Box pane and select Network Connections (or search Azure for Network Connections).
Select “+ Create” to create a new Network Connection by selecting what subscription and resource group to use. Also, give the network connection a name and select what Azure Vnet you would like to use (if you haven’t created a Vnet already, you will need to do that first). Press “Review + Create” and create your Network Connection.
In this example I’m using Azure AD joined devices as selected as “Domain join type”. If you want to use Hybrid join instead, you will need to add some additional information about your domain.
Once you have created your Network Connection, you will need to create a project. This is where gather each project you would like to use the Dev Box PCs in and define what machines are available by creating Dev Box pools. In the Microsoft Dev Box pane, select Projects.
To create a new Project, click “+ Create” and select what subscription and resource group you want to use. Select which Dev-center you would to use and give your project a name. Press “Review + Create” and create your Project.
Now we need to define what machines are available for our users by creating a Dev box pool. There are a few different “sizes” available, and you can read more about them on Microsoft site about Microsoft Dev Box, where you can find out the pricing for each.
To create a new Dev box definition, navigate to the project you created earlier and select Dev box definition on the bottom of the left-hand menu.
To create a new Dev box definition, select “+ Create“. Give your definition a name and then select a Windows image to use, in this example we will use a Microsoft-provided image, but you could upload your own if you would like. Make the appropriate selections of what size you would like on the machine and click “Create”.
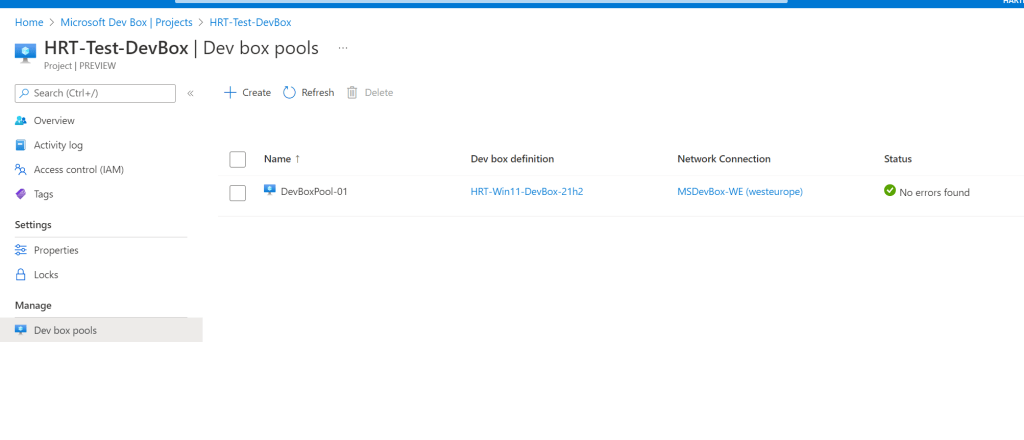
The next step is to create a Dev box pool in your project, do this by navigating to your project you created earlier and selecting Dev box pool.
Create a new Dev box pool by pressing “+ Create” and giving your new pool a name. Select the Dev box definition created earlier and also the network connection. You will also need to confirm that your organization has Azure Hybrid Benefit, you can read more about what that means here.
Once you have filled out this, create the dev box pool by clicking “Create” at the bottom of the page.
The last thing we need to do is to assign users the rights to consume machines and work in our project. Prior to this, it’s a good idea to create an Azure AD group that will contain our users.
To configure the access to our project we will head into “Access control (IAM)” in our project.
To add a new assignment, click “+Add” and select “Add role assignment”. In the list of roles, find and select the “DevCenter Dev Box User” role and press next.
On the next page, add your Azure AD group which contains the users who should have access to the project. Once you have added this group to “Members” press “Review + assign” to finalize your role assignment.
You can verify that the assignment was successful by looking in the list for the role and validating that your group is listed.
And that’s it! You have now successfully prepared your environment to use Microsoft Dev Box!
User experience
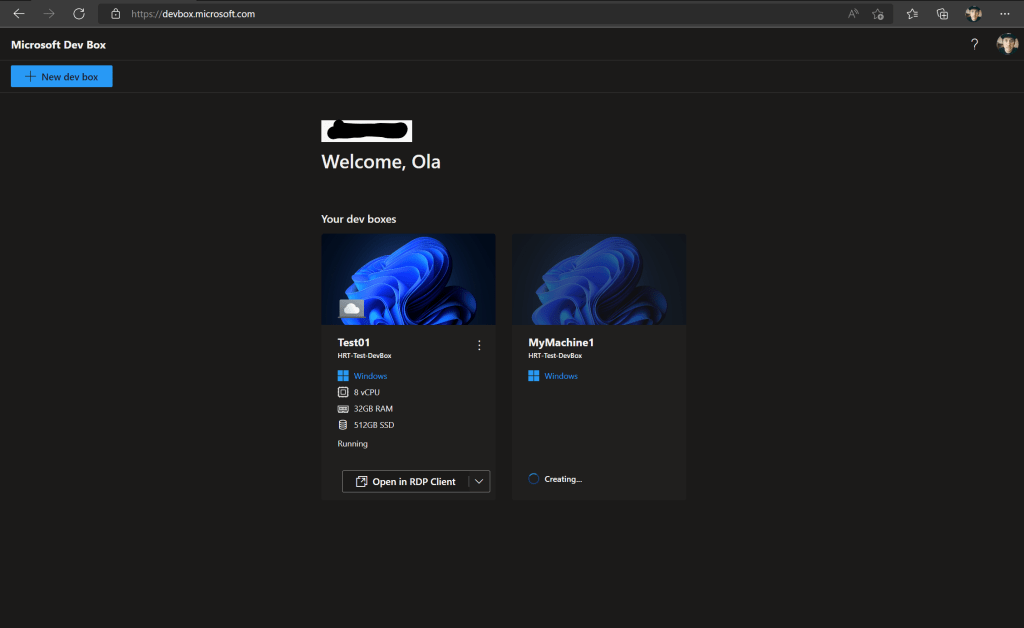
For users to create new Microsoft Dev Box machines, they will need to access devbox.microsoft.com and sign in with their user account.
Once signed in, the experience is similar to the Windows 365 end-user portal, but there is a new button called “+New Dev box” where users can deploy machines themself.
Once you click that button, a fly-out will appear where you can see the specification on the machine you are allowed to deploy (based on the definition we made earlier) and you are asked to give your machine a name. Once you have given the machine a name, which will be the name displayed to you for your convenience (MEM will show a CPC-xxxxx name), press “Create“.
The creation of a machine will take somewhere around 30-90 minutes. Once the machine is done, it will show in the portal where you are right now but also in the Remote Desktop app where you have all your other Windows 365 machines. A bonus fact is that it will also appear in the Windows 365 portal, marked as Dev box, but you cannot create new machines from there.
Once the machine has been created, you can connect to it and start using it!
One thing you will notice if you are deploying Cloud PCs is that the Enrollment Status Page (ESP) from Windows Autopilot will or might appear when a machine is being set up. I’ve seen numerous instances where the ESP has failed causing the Cloud PC to lock out the user at the initial start. This is usually fixed by reprovisioning, but an unnecessary call to the service desk can cause frustration with your users and your administrators.
The ESP is not an important part of the Windows 365 provisioning in most cases, hence it can be disabled by a custom policy.
Create the policy
To create a custom configuration policy, go to the Microsoft Endpoint Manager admin center (endpoint.microsoft.com) and navigate to Devices > Windows > Configurations Profiles.
Select to create a new profile and select Custom as template.
Give your profile a name based on your naming convention and press Next.
Select to target All devices but filtered to only target Windows 365 devices. You can read more about how to do that in this blog post about filters.
Finish the wizard by clicking Next until you reach the last step, then click Create.
You have now successfully created a configuration profile that will skip the ESP for all your Cloud PCs.
Summary
The ESP is something that in Windows Autopilot is very useful, but for Windows 365 it’s not crucial. This will also reduce the risk of random errors during provisioning.
Applications that are needed before the user starts working can be assigned using the assignments to “All Devices” and filter out your Cloud PCs since this will evaluate a lot faster than Azure AD groups.
As all swedes, summer means well-deserved summer vacation for me. For me personally, this means that I almost completely check out from work stuff for a few weeks.
So playing catch-up with what happened during the summer is always fun! I will cover some of this news in an upcoming post, but I thought I would gather all this for you in one place to start with!
I’ve gathered some of the highlights I’ve found during the summer.
Have I become an MVP!?
So this is kind of a big deal for me, and something I’ve been working towards for a while. I’ve been awarded the MVP titles within Windows and Devices for IT, and I am part of the Windows 365 MVP team!
I’m very happy, honored, and excited to get this award since it’s been something that has been my long-term goal for a while. So this is huge for me personally!
This was something that was announced as a preview this spring and went to general availability during the summer. Windows Autopatch is a way to have Microsoft take care of patching and servicing, making sure your devices are always up to date! I will write a blog post about this in the upcoming weeks, but until then you can read more about it here: What is Windows Autopatch? – Windows Deployment | Microsoft Docs
Ignite is back on and as a hybrid event!
Microsoft announced during the summer that they will host Ignite again where you can attend IN PERSON, but also remotely if you prefer. For me personally, attending Ignite remotely is always a challenge since it’s hard to take the needed time to dedicate to attendance due to your everyday commitments. So being able to attend in person again is great!
Ignite will be hosted in Seattle in mid-October and you can read more about it here (and sign up to get updates): Your home for Microsoft Ignite
Windows 365 updates
During the summer there have been some neat small updates to the Windows 365 service as well.
Some of the new features introduced are:
Support for virtualization-based workloads
Secure boot on Cloud PCs
Resize Azure AD joined Cloud PCs
Transfer files using windows365.microsoft.com and the web client
I will dig into some of these in upcoming blog posts!
Detect and manage hardware changes on Windows Autopilot devices
One thing that has been troublesome when using Windows Autopilot is how to manage hardware changes. Microsoft have now introduced support for this in the admin center.
Windows Information Protections (WIP) being depricated
With Windows 10, Microsoft introduced Windows Information Protection, WIP, which was formally known as Enterprise Data Protection (EDP). Now WIP is being sunset and transitioned over to Microsoft Purview over time. According to the blog post below things will move gradually over to Microsoft Purview. You can get started today with a free trial. If you are using E3 licenses, there will be an additional license needed but with E5s it is included.
“Beginning with Windows 10, version 21H2, feature updates for Windows 10 release are released annually, in the second half of the calendar year, to the General Availability Channel. They will be serviced with monthly quality updates for 18 or 30 months from the date of the release, depending on the lifecycle policy.” – Windows 10 – release information | Microsoft Docs
News in Microsoft Endpoint Manager
There have been a lot of updates around macOS and Settings Catalog this summer, but also a few updates around Android, iOS, and Windows.
This is a well hidden gem in Microsoft Endpoint Manager (MEM). Filters. I’m not to sure that all of you knows what this is. Maybe you have seen it when setting the assignments for a profile.
Or when going to Tenant Administration.
But what are filters?
Filters in Microsoft Endpoint Manager
Filters in MEM is a way to assign profiles, applications and much more in MEM using the built in “All users”/”All devices” groups or a larger target group, and then filtering out based on specific conditions. You create the filters and set the conditions for the filters.
Filters basically singles out users or devices from a larger group of devices, just like filter does. You can re-use the same filter on different assignment groups and get different result for your policy.
The benefits with using filters instead of several dynamic groups is that the filters are evaluated instantly, which makes applying things with them a lot faster then having a dynamic group needing to process which members it should have.
One example could be that you want to be able to single out only Windows 11 computers to apply a specific policy just to them.
Creating a filter
To use a filter, you must first define the conditions of it by going to the MEM admin center (https://endpoint.microsoft.com) and navigate to Tenant administration > Filters.
To create a new filter, press “+ Create” and give your filter a name and select what platform to target. In this example, we will create a filter which will filter out Windows 365 Cloud PCs running Windows 11.
In the next step, you will need to create the conditions for your rule. Since I want to create a filter to single out Windows 365 Cloud PCs running Windows 11, I will add conditions for this by stating that osVersion should start with 10.0.22 (which is the easiest way to identify Windows 11), and that the manufacturer equals Microsoft Corporation, and that model name starts with Cloud PC.
You can also write your own syntax instead of using the built in values.
The easiest way to find the information for your filters is to go to Devices > Windows > Windows devices and search for a device which meets the requirements for your filter. Click the device and select Hardware in the menu, that will show you the information you need.
Once you have configured your rule, you can click the “Preview devices” at the bottom of the filter configuration to validate that your filter is doing what you wanted.
For this filter, I want to be able to select the Cloud PCs running Windows 11, which you can see here that it was able to find.
When you are happy with your filter configuration, click next followed by create.
Using a filter
You can use filters in a lot of different places in MEM. To see what’s currently supported to use filer, have a look at Microsoft Docs. New applications of filters are added constantly.
As of now, I want to deploy and app to only my Cloud PC running Windows 11. I want to make this application available for all my users, but only if they are using a Cloud PC running Windows 11.
The first thing I do, is to add the built in “All users” group to the “Available for enrolled devices” segment under Assignments for the application.
Next, I click on the blue text “None” under Filter mode. To use your filter, you first need to select how you want the filter to behave. You have 3 options.
Do not apply a filter
Include filtered devices in assignment
Exclude filtered devices in assignment
In this case, I want to include my Cloud PCs running Windows 11, so I select the include option. Next step is to select the newly created filter called “Cloud PC Windows 11”. Once I have selected the filter, I press “Select” at the bottom of the screen.
You will now notice that the filter has been applied to our assignment.
Now only my Cloud PCs running Windows 11 will be able to install the application.
Summary
Filters are a great addition to MEM and doing assignments, since you can target on a wider group and select just a few devices from that group. You could also make sure that only certain things gets applied to a users device which fulfills your requirements. One such scenario could be that you wish to enforce installation on a users device if the ownership is set to “Corporate” but make it available if ownership is set to “Personal”. There are a lot of different scenarios where this could be super handy!
The best thing is however that applying things using the built in “All devices” and “All users” group are usually a lot faster, and you don’t end up in a scenario where the user or device was not added to the group for a mandatory application. You can then filter out only specific devices from that larger group.
Securing the access to Windows 365 could is important. Today, MFA something everyone should use and you should definitely use it to access your Cloud PCs!
Given that you have Azure AD Premium P1 or P2 (it’s included in at least the Enterprise SKU of M365), you are able to use Conditional Access (CA) to enforce MFA. It’s a great idea to always require MFA for all cloud services.
Windows 365 is like you might have guessed a cloud service, which will in that case get the MFA requirement.
But what if you want to add other conditions that are specific to Windows 365 and Cloud PCs? Making sure that these are only accessed from e.g. your managed devices. There are some caveats to this however what I’ve noticed, like for example if you have added the Cloud PC to the Remote Desktop app it will only evaluate the CA rules when adding the account, but if you are using the browser the policy hits each time.
If you set up the CA rules prior to getting your users going however, you will be able to control this in a much better way.
Creating the policy
To create the Conditional Access policy, you must first of have the correct role to do so (e.g. Security Administrator, Conditional Access Administrator, or Global Administrator).
Next up, in Microsoft Endpoint Manager, navigate to Devices > Conditional Access and press “+ New Policy”.
Start by giving your new policy a name.
Next step is to select what users to include in this CA rule. In this example I’m assigning this to all users.
We now have to select what cloud apps are included in this CA rule by going to “Cloud apps or actions”.
Choose “Selected apps” as included, search and add “Windows 365” and “Azure Virtual Desktop” to make sure that your rules applies to all your cloud PCs.
Once you have selected the apps, go to Conditions.
Here we will add Any Device under “Device platforms”.
And also Browser and Mobile apps and desktop clients under “Client apps”.
Once you have added these, move further to Grant under Access control and add your requirements for granting access.
In this example, I’m only allowing compliant devices to sign in to the service, which means devices which are marked as compliant in Microsoft Endpoint Manager, which means that they are managed and healthy devices. You can also add additional requirements here and have it set to require to fulfill only one of the requirements, e.g. complaint OR require MFA. You can of course also set it to require both being compliant AND require MFA, this is controlled under the “For multiple controls” section. In this case, I’ve left it to it’s default value.
Once you have added all your settings, make sure to set the “Enable policy” switch to ON instead of “Report-only” to activate the policy. However, be aware that you could potentially look your self out by doing a faulty CA rule.
Click create at the bottom of the screen and your policy will take effect within minutes!
The experience
So what happens when this Conditional Access rule hits?
For the Remote Desktop app, it will only take affect when adding a new account. So if you already have an account added, nothing will really happen.
But when you try to add a new account, it will not grant you access unless you meet the requirements set in the policy.
For the browser, when accessing your Cloud PC through the Windows 365 portal (https://windows365.microsoft.com) you will also be met by a message not granting you access. This message is however a bit more cryptic and doesn’t really tell you what’s wrong. But
Conclusion
That is a quick guide how to get started with controlling the access to your Cloud PCs using Conditional Access. You could do a lot of cool stuff with this based on your scenarios and needs. You could also throw some session control into this or only granting specific user roles access to this combined with a few more policies to create a cloud based Privileged Access Workstation (PAW).
You could also compliment the policy with a session control to control how often it needs to be re-evaluated.
This configuration I didn’t doesn’t really support the “work from any device” concept, but I just wanted to show what was possible!
We use cookies on our website to give you the most relevant experience by remembering your preferences and repeat visits. By clicking “Accept”, you consent to the use of ALL the cookies.
This website uses cookies to improve your experience while you navigate through the website. Out of these, the cookies that are categorized as necessary are stored on your browser as they are essential for the working of basic functionalities of the website. We also use third-party cookies that help us analyze and understand how you use this website. These cookies will be stored in your browser only with your consent. You also have the option to opt-out of these cookies. But opting out of some of these cookies may affect your browsing experience.
Necessary cookies are absolutely essential for the website to function properly. These cookies ensure basic functionalities and security features of the website, anonymously.
Cookie
Duration
Description
cookielawinfo-checkbox-analytics
11 months
This cookie is set by GDPR Cookie Consent plugin. The cookie is used to store the user consent for the cookies in the category "Analytics".
cookielawinfo-checkbox-functional
11 months
The cookie is set by GDPR cookie consent to record the user consent for the cookies in the category "Functional".
cookielawinfo-checkbox-necessary
11 months
This cookie is set by GDPR Cookie Consent plugin. The cookies is used to store the user consent for the cookies in the category "Necessary".
cookielawinfo-checkbox-others
11 months
This cookie is set by GDPR Cookie Consent plugin. The cookie is used to store the user consent for the cookies in the category "Other.
cookielawinfo-checkbox-performance
11 months
This cookie is set by GDPR Cookie Consent plugin. The cookie is used to store the user consent for the cookies in the category "Performance".
viewed_cookie_policy
11 months
The cookie is set by the GDPR Cookie Consent plugin and is used to store whether or not user has consented to the use of cookies. It does not store any personal data.
Functional cookies help to perform certain functionalities like sharing the content of the website on social media platforms, collect feedbacks, and other third-party features.
Performance cookies are used to understand and analyze the key performance indexes of the website which helps in delivering a better user experience for the visitors.
Analytical cookies are used to understand how visitors interact with the website. These cookies help provide information on metrics the number of visitors, bounce rate, traffic source, etc.
Advertisement cookies are used to provide visitors with relevant ads and marketing campaigns. These cookies track visitors across websites and collect information to provide customized ads.